Setting Up SSH Tunnels Using PuTTY
In order to send mail through Silvertree’s SMTP server, you must use a SSH tunnel. At this time, we do not support SMTP AUTH (it may be in the future, but the tunnel is the preferred method). By sending SMTP traffic through the SSH tunnel you will not notice any noticeable performance degradation. We also recommend setting up a SSH tunnel to read your IMAP/POP3 Mail (if you are not using SSL to access your mail). Those instructions are listed here as well.
In order to set up a PuTTY tunnel perform the following steps:
- Download the PuTTY client from http://www.silvertree.org/mirror/putty/download.html (Silvertree is an official PuTTY mirror). These screen shots are of the Windows Client installed by the installer.
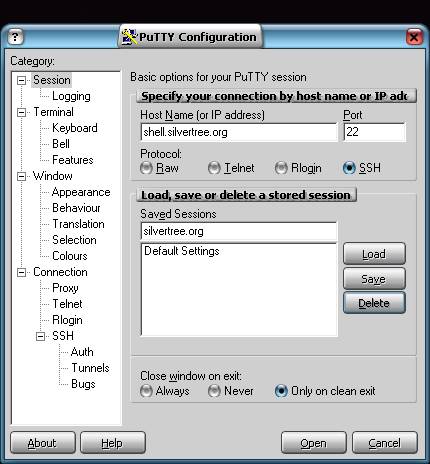
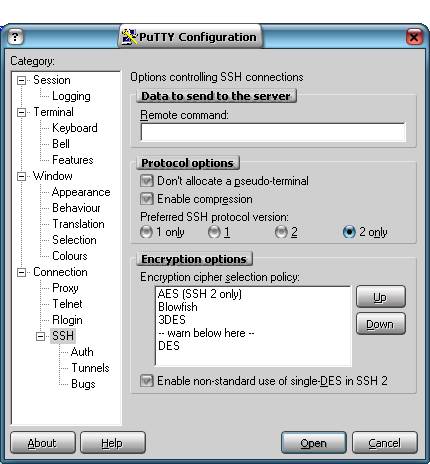
- Configure
the Silvertree SSH connection
- Add
the Tunnels you need
In the “source port” box type in the port number (25 in this case)
In “destination” type “smtp.silvertree.org:25
Click “Add”
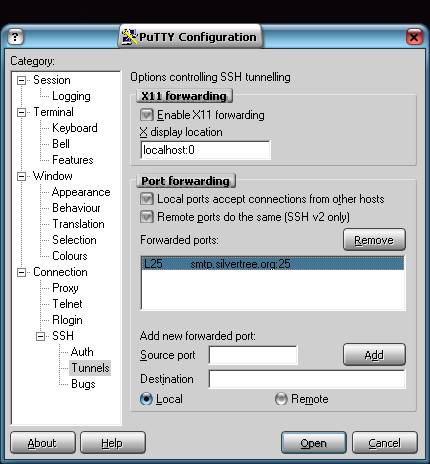
You should now have a screen like above
To set up the IMAP port, do the following:
In the “source port” box type in the port number (143 in this case)
In “destination” type “mail.silvertree.org:143
Click “Add”
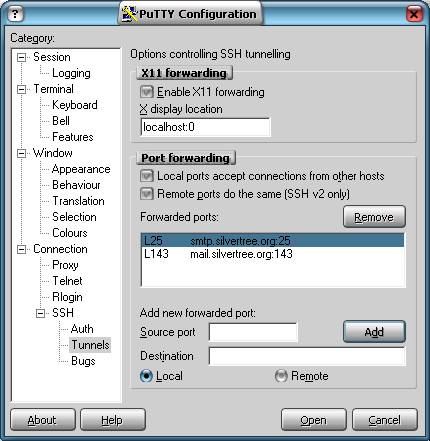
Your dialog box should look like the above
To add POP3 support do the following:
In the “source port” box type in the port number (110 in this case)
In “destination” type “mail.silvertree.org:110
Click “Add”
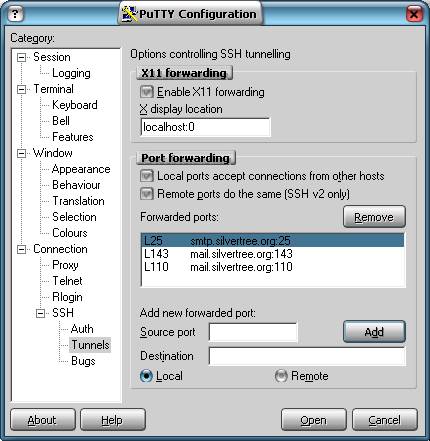
This screen shot shows all three tunnels needed for mail: IMAP, POP3 and SMTP. - Save
the session

- Your PuTTY setup is complete.
- Set your mail client to use localhost as the SMTP server
- Set your mail client to use localhost as your POP3/IMAP server
- PuTTY (or your SSH application with the tunnels set up) must be running in order for your mail client to work.
If you have any questions, please e-mail archon@silvertree.org